Wednesday, 15 June 2011

First attempt to photograph an orange

Finally I've found something that I'm actually interested beside Landscape & Nature Photography. I've been reading and studying on food photography for a period, and this is the first time I try to shot a food photography.

It was a boring afternoon, nothing much to do in the afternoon. Suddenly I came out with an idea from no where of shooting an orange. Without thinking it twice,  I get everything set up and start shooting.

I used only one orange, a plate, fake flowers, bamboo mat and a plastic orange juice squeezer for styling. For the photography side, I'm using my 50mm f1.8, mounted on tripod. Shooting in f1.8 and a few pieces of A4 paper as reflector. For the two images at the side, I didn't shoot that pic, it was taken by my girlfriend who is playing with the marco extension tube and the 18-105mm kit lens.

After shooting for some time, here is the result. A start for me to get into food photography.
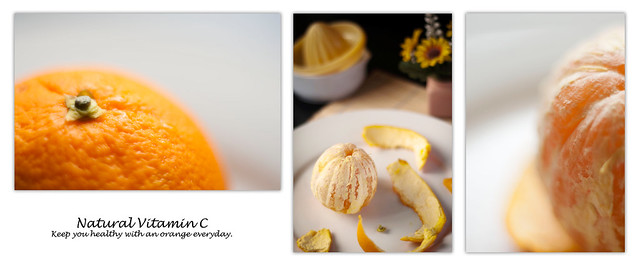
Natural Vitamin C

Not a very good one yet, but I'll work harder on the composition side, color & shapes arrangement, especially in styling. In the same time, I will do more homework on the lighting control. Now I will be shooting all the food that require less styling. Focus more on the shooting skills, white balance, lighting control, colors & shape arrangement, as I mentioned just now.

Looking forward to shoot other type of food. =]

Tuesday, 10 May 2011

Fantastic Outing with liewwk!

Is been awhile I didn't update my blog, and that is how long I didn't really sit in front of my laptop top with my fingers on the keyboard.

On the 30th of April 2011, I went back to my hometown. In the same weekend, I saw one of my favorite photographer host an outing on that day. Without asking more details, straight away I register my name to that outing.

We gather up at 11pm and we had a short briefing. Liewwk:"We will gather up until 1230am, then we will start our journey. The destination is about 2 hours drive from here. We will reach there around 3am, then we will have a break at the mamak. Then we will go in for shooing at 4am until sunrise."

I was like..... WTF!....I didn't know that it will spend the whole night. What was in my mind is, gather at 11pm, then shot, then go home at 3am. It was a bit shock at the beginning, but awhile later, I felt so excited. It is been a long time that I didn't really go for such a huge outing.

It is a long way drive from PJ. I meet new friends, and we had fun chatting in the car. As expected, we reach our destination at 3am. We had a rest/check point at the mamak near by before we drive into the shooting area, Surprisingly, there are more people joining us! They are from the north side of Malaysia. So, they meet us at the mamak instead of PJ. Finally, the clock stuck at 4am, 9 cars driving to the same destination. Everyone have the same hobby and we are all here to do the same thing. I felt so excited, and I don't feel tired at all, although is already 4am.

Once we stop by, without wasting anytime, everyone set up their gears and start shooting. There are two lakes around us, with no lights at all. Looking up into the sky, it is just so beautiful. We can see the sky full of stars. The most incredible experience was, I can see the milky way with my bare eyes!

We had a great shooting time for that few hours. We are shooting stars, milyky way, stars trail. Later on, when the sun rises, we manage to have a great view of sunrise. It is not ideal, due to the clouds around. There are too much clouds that night, but the view is still very beautiful and stunning.

Here are some shots of mine.

Milky

Here is my milky way shot. Too bad, it is out of focus, aperture is not wide enough. And a lot of noise. Tips for milky way, widest aperture + high ISO + wide angle.

Full of stars~

Lonely Tree

Some shots of the stars. Unable to shot the star trail. Don't have the right equipment on hand. OMG... going to buy another toy. The shutter release cable! Shooting at widest aperture, widest angle. Tripod mount and remote release. Shutter speed around 1 minute.


The night shots are not satisfying, but is a great experience to me. I've gain more experience in shooting stars, milky way and star trails. No doubt, I'm going to do it again in the future.

This is the only HDR I took for the day. Hmm.... kinda flat image for me...

HDR

Here comes something that I'm more familiar with. Sunrise!!!!

sunrise

Purple white balance! Manually set in camera. I just love the reflection on the water. Although we can't see the sun coming out, but the colour and reflection is just stunning.

sunrise with purple white balance

sunrise11

Warm White balance! A 55mm x 1.5 shot for landscape. Ngek ngek ngek. So, Don't ever think of wide angle is the only choice for landscaping. I've seen people using 70-200mm f28 for landscaping.

sunrise with warm white balance

Seriously, this is a very nice outing. Too bad, I'm rushing back to PJ. I left earlier with another 2 guy right after the sunrise. Else I will have more time to shot with a more relax mode. And have more time to chat with new friends. Looking forward for the next outing by Liewwk. His photos are just too good. Totally inspiring. So much more to learn........

Lu Ting Jieh

Wednesday, 20 April 2011

Android's Photography Apps - Photo Tools

While I'm shopping in Android market, this apps caught my attention. I read the review, four our of five. Hmm... not bad... So I give it a try and install it to my phone. Since it is a free apps, why not? haha, I can just uninstall it if it is not nice. After installing it, I feel it is kinda fun, some functions seems to be useful, but I cant find a place to use it wisely yet.


This contains quite a numbers of tools in it, as shown below:


-DOF & Hyperfocal Distance Calculator
-Field Of View Calculator
-Exposure Reciprocation Calculator
-Flash Exposure Calculator
-Multiple Exposure Compensation

-Minimal Shutter speed Calculator Calculator
-Sunny 16 (EV) Calculator
-Blue & Golden Hour Calculator
-Moon Phase & Exposure calculator

-Location info
-Weather Forecast
-Graycard
-Colour Wheel
-Colour Temperature Chart
-Image histogram Viewer
-Photo Enlargement Calculator
-Sharpening Radius Calculator
-Level Indicator
-Check List
-Note pad
-Grid Overlay Camera
-Gallery For Inspiration
-Simple Touch Paint
-And some website link


For a newbie like me, I would say this is a fun apps. The first thing came out in my mind when I open the apps for the first time was "What the hack is this? How do I use this?". Slowly, after spending sometime google-ing it, I manage to understand how it works and how to apply this apps to real life shooting. In the same time I've learn more about my camera, lens, and some photography calculations. 


There are a few calculators are fun. Especially the Hyperfocal Distance Calculator, Flash Exposure Calculator and the multiple exposure compensation calculator. It makes me google every doubt, just to fill in requested value. I gain knowledge from there, as well as the progress google-ing it. 


Beside that, it can locate your location by activating your GPS. With the GPS and location, it can calculate sunrise/sunset timing, moon phase & exposure and weather forecast. 


This apps come along with some diagram such as the colour wheel and colour temperature chart. This seems to be useful to me, as I always forget the colour wheel. I can just refer here when ever I need it. 


It has a checklist in it. So you can check what you have to do before you go out for shooting. You also can make a note with this apps. There is also a link to show you some inspiring photos through internet connection. Some of the photos are great, totally inspiring. 


Below are some screen shot taken from android market webpage. 


Personally feel this is more useful for landscapers. To rate this apps, I will rate it 4/5. Some of the tools are nice. Some are kind of useless to me and some are just a reference. If you had understand it, you don't need this apps. Anyway, it is just a phone apps, and it is FREE! What else do you expect from it?


Since it is a FREE apps, why not give a try, download it, and play with it. You can uninstall it anytime after you get bored with it, master everything in it or you found that it is not useful to you. It all depends on you.


You can visit here for more info or download it to your android phone. And here to understand more detail about this apps. 


Lu Ting Jieh

Saturday, 9 April 2011

Is DSLR a trend?

There are more and more people getting a DSLR. In the same time, there are more and more people talking around, asking around, having a topic about DSLR , some are saying DSLR is a trend.

"Everyone is getting an DSLR because everyone is getting one."

But I think in the other way round. Is it true that everyone is getting a DSLR because everyone is getting one? Why isn't that they are getting a DSLR because they want to take a good or better pictures? I do feel like, more and more people getting to understand the important of keeping their daily live photos or the fun of sharing their photos.

Photo sharing is getting more and more common now a days. We can easily share our photos online and we can easily view others people's photos. On the other hand, digital technologies are also getting more and more common in our daily life. It is very normal that everyone have a digital camera. A very easy example to tell how common is a digital camera now a days. Just compare how a person fake pose a "shooting-a-photo" pose. When I was a kid, I put my hands right in front of my face and pose like I'm shooting with a Kodak film camera. Now, people will use their thumbs and index finger to make a frame and pose like they are using a digital live view camera. No one ask to pose like that. It just came up into their mind when you ask someone to pose a "shooting-a-photo" pose.

With a more advance photo sharing website now a days, photos can be uploaded and shared easily. The most important is, it can be view by anyone easily. Just like Facebook, it can auto resize and upload your photos. Then all of your friends can view the photos, even non friends accounts!!

On the other hand, the price of getting a DSLR is being more affordable comparing to 5 years back. Today, people are getting a DSLR because of everyone having one or people want to get a DLSR because they want to get a better picture to share/keep?


Lu Ting Jieh

leaves

Thursday, 24 March 2011

First DIY Product Shooting!!

Finally I got my chance to play with my new toys as I had posted previously. I made two stupid mistakes, did not plan on how to set things up and did not bring my external flash. So I ended up spending more than half and hour to do the set up and make a instant bouncer for my pop up flash.

As you can see from the image below, this is the setup for my product photography shooting.
***Hopefully you can see the words in the picture***


I use a box as the backdrop support and a few pieces of A3 papers as backdrop. So it is does not show any transparentness.Then 2 main lights with diffuser at the side. At first, I thought of shooting with only 2 main lights and that is just not working. Without any choice, I had to use my pop up flash to add in more lights from the top. So I cut down the diffuser, and put an A3 paper on top as a reflector. As shown in the picture. 

In order to avoid direct flash, I instantly make a bouncer for it. So the light can bounce to the A3 reflector and flash on top of the product. It do helps!! A LOT!!!! Here is another two pictures showing the left and right side of the set up and another one when I turn on the main lights with the room lights off.


I started to shot with my prime lens, 50mm f1.8 which I can't really handle it for this shooting. So I change back to my kit lens 18-55mm which has a the shortest minimum focus distance, 0.18m among all my lenses.  Where I can place my camera real close to the object.

I tried to shoot at f8, where more people recommend to use. But I feel that f14 gives a sharper image when I zoom into the picture from my camera. Perhaps I should have shoot in both aperture and view it in PC. Never mind, I'll compare it again on the next shooting.

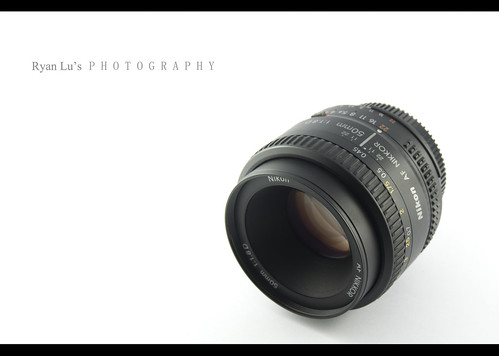
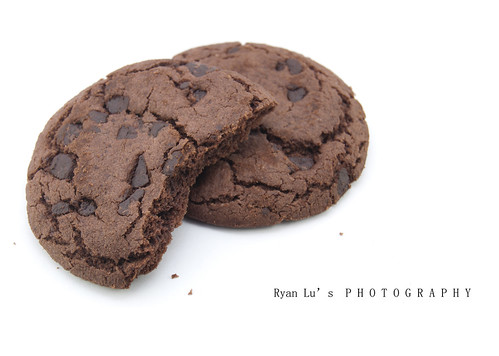
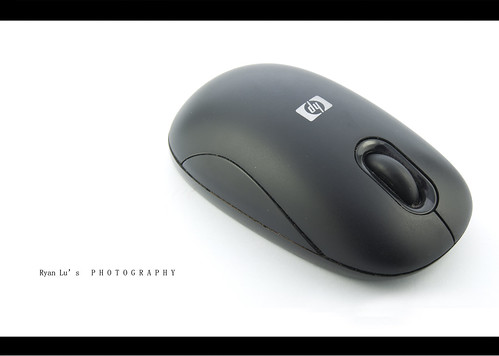
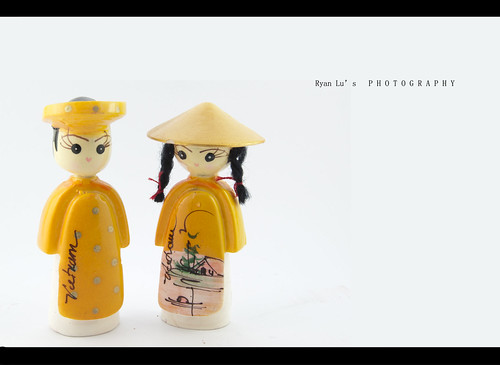
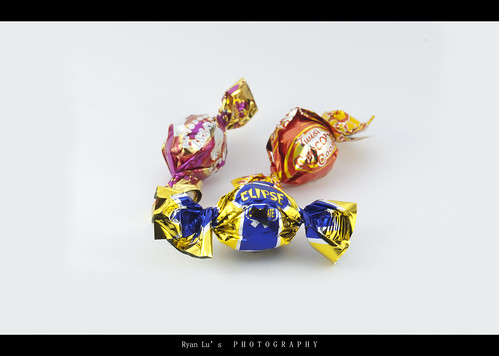
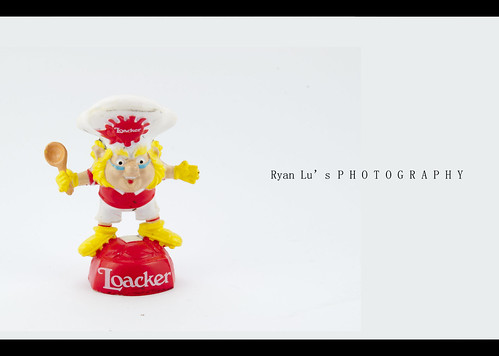
Finally, I set my camera to settings to ISO 100, f14, shutter speed at 1/6sec with pop up flash. And these are the results I've got! Not perfect , but I feel satisfy for my first product shooting. No serious image editing, only cropping, adding text and white balance to 5500k.

50mm f1.8


chips more


mouse


doll


sweet


cheif


Will try different items in the future. Perhaps something much bigger or something that reflects light, such as glasses. Anyway, feel free to comments.

Cheers!

Lu Ting Jieh